Posted on Leave a comment

What Do You Need To Make Edibles? Your DC Guide

You're probably here because you want homemade edibles that work, taste decent, and don't turn into a long, uncomfortable night. That is the challenge. Making edibles isn't hard, but making predictable edibles takes some care.

In the DC, Maryland, and Virginia area, the biggest difference between a smooth edible session and a bad one usually starts before you ever turn on the oven. It starts with what you buy, how you activate it, how carefully you infuse it, and whether you respect the slow onset of edibles. Clinical research has documented that edible effects are delayed, with onset effects averaging about 3 hours post-ingestion in some studies, which is exactly why people get impatient and overdo it when they treat edibles like smoking or vaping (clinical overview of edible cannabis use).

If you're asking what do you need to make edibles, the short answer is simple. You need quality cannabis, a way to decarb it properly, a fat to infuse, a few basic kitchen tools, and enough patience to dose carefully. The longer answer is where the useful details live.

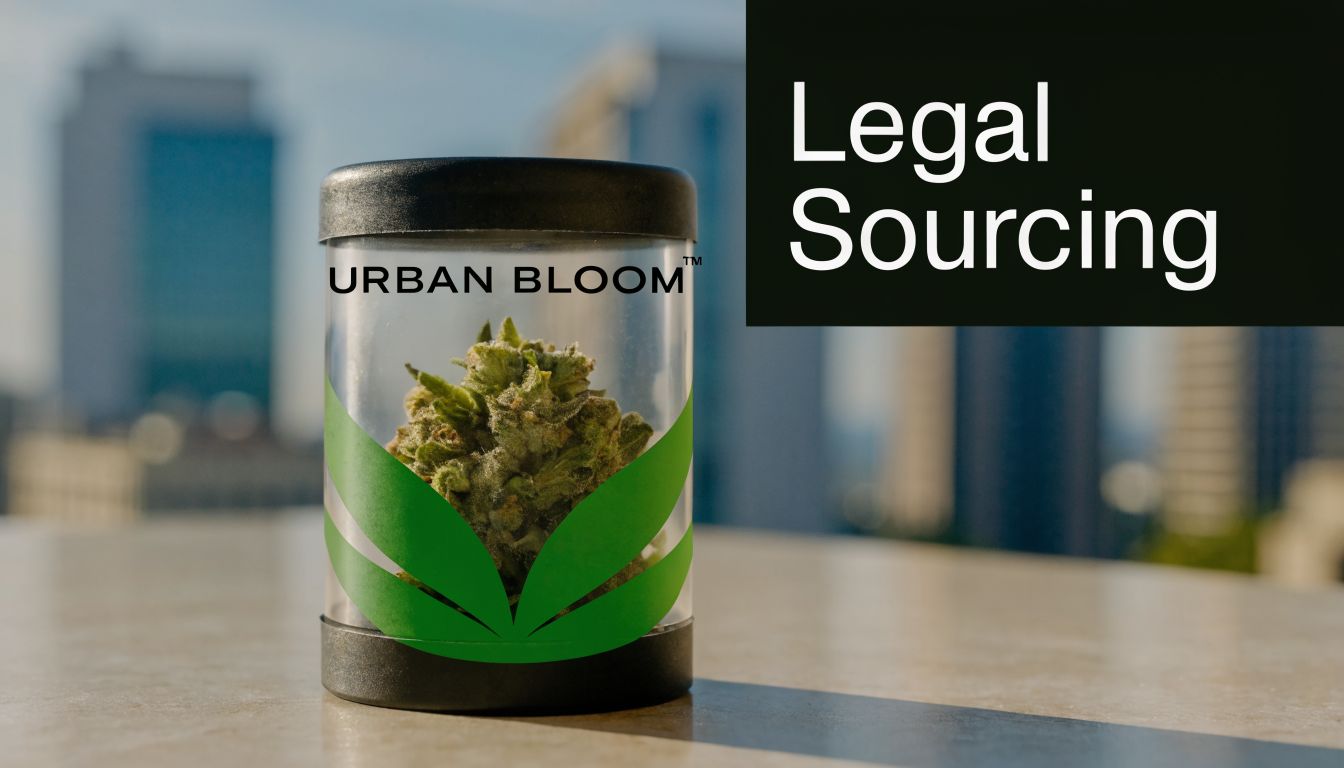
Sourcing Your Key Ingredient in DC, Maryland, and Virginia

The first real decision is whether you're making edibles from flower or from a concentrate. Both can work. They just solve different problems.

Flower is the classic starting point. It gives you flexibility, and many home cooks like that it feels familiar. You can decarb it yourself, infuse it into butter or oil, and use that infusion in brownies, cookies, chocolates, or gummies. The downside is that flower takes more work, and if the product isn't tested, your potency estimate can drift fast.

Concentrates are a different lane. Distillate is the easiest for a lot of people because it's already more refined, easier to mix into recipes, and cleaner in flavor than a flower infusion. If you hate the strong herbal taste that homemade edibles sometimes carry, concentrates can make your finished product much more neutral. The trade-off is that beginners sometimes treat concentrates casually, when in reality they can make dosing mistakes even faster if they don't know what they bought.

A clear jar containing a cannabis flower bud with an Urban Bloom logo against a blurred city.

Why tested cannabis matters more than strain hype

When people shop for edible ingredients, they often get distracted by strain names. For homemade edibles, the more important questions are practical:

  • Is it lab-tested
  • Do you know the potency
  • Is it clean enough that you want to cook with it
  • Will the flavor fit the recipe

That matters in the DMV because plenty of people want to skip guesswork. In DC especially, tourists and occasional users often don't realize how much homemade potency can swing when the starting material is inconsistent. If you can't trust the label, you can't trust your math later.

Practical rule: Buy cannabis for edibles the way you'd buy ingredients for a dinner party. If you wouldn't trust the source for something you're serving to friends, don't cook with it.

This is also why reliable delivery or dispensary sourcing beats random pickup options. In DC, if you're still learning the local system, a basic guide to buying weed in DC helps you understand what compliant purchasing looks like and what questions to ask before you order.

Flower versus concentrate for real kitchen use

Here's the practical comparison:

Starting material Best for Main advantage Main drawback
Flower Brownies, cookies, infused butter, infused oil Flexible and familiar More smell, more prep, stronger plant flavor
Distillate or similar concentrate Gummies, chocolates, no-bake recipes Cleaner taste and easier mixing Easier to overdo if you don't track potency carefully

Consumer demand has moved hard toward consistency. U.S. edibles sales rose from $2.2B in 2020 to $3.4B in 2022, with gummies dominating the market, according to Fortune Business Insights on the cannabis edibles market. That doesn't just say edibles are popular. It tells you what people value most: repeatable dosing and products that don't feel like a gamble.

The local angle in DC, Maryland, and Virginia

In DC, delivery is part of how many adults prefer to source product because it's simple and discreet. In Maryland and Virginia, many home cooks rely on licensed dispensary options available to them based on local rules and eligibility. The common thread across all three is the same. Start with something tested and clearly labeled.

That's the boring advice. It's also the advice that keeps your brownies from becoming a chemistry experiment.

Gathering Your Essential Kitchen Equipment

You don't need a commercial kitchen to make strong edibles. You do need a few tools that keep the process controlled. The people who say edibles are “easy” usually skip over the part where sloppy tools create sloppy dosing.

The short list that actually matters

Start with these:

  • Digital scale for weighing flower or concentrate accurately
  • Oven thermometer because many ovens run hot or cold
  • Grinder for breaking up flower to a coarse, even texture
  • Baking sheet lined with parchment paper for decarbing
  • Double boiler or slow cooker for gentle infusion
  • Cheesecloth or fine mesh strainer for filtering plant material
  • Heat-safe glass jar or bowl for storing infused butter or oil
  • Measuring spoons and cups for recipe consistency

If I had to pick only two essential items, it would be the digital scale and the oven thermometer. Without the scale, your potency estimate is loose before you even begin. Without the thermometer, your oven can wreck the batch.

Why cheap shortcuts fail

A lot of home cooks eyeball their cannabis and trust the oven dial. That's where bad batches come from.

A grinder matters because you want coarse, even pieces, not powder. Powder extracts more chlorophyll and leaves your infusion grassy and bitter. A lined baking sheet matters because cleanup is easier and the cannabis stays spread out instead of clumping. A slow cooker or double boiler matters because direct heat is aggressive and unpredictable.

Most edible mistakes don't come from the recipe. They come from poor temperature control.

One setup for beginners

If you want the simplest beginner setup, use this combination:

  1. Flower
  2. Hand grinder
  3. Sheet pan with parchment
  4. Oven thermometer
  5. Small slow cooker
  6. Cheesecloth
  7. Mason jar for storage

That setup is forgiving. It gives you room to move slowly and fix small mistakes before they become big ones.

What not to waste money on first

You don't need specialty infusion gadgets to make good edibles. They can be nice, but they aren't required. Learn the fundamentals first. If you can decarb accurately, hold a low infusion temperature, and portion your final recipe evenly, you've already solved most of what matters.

The equipment should make your process repeatable, not fancy. A plain kitchen setup with decent measuring habits beats a drawer full of gimmicks every time.

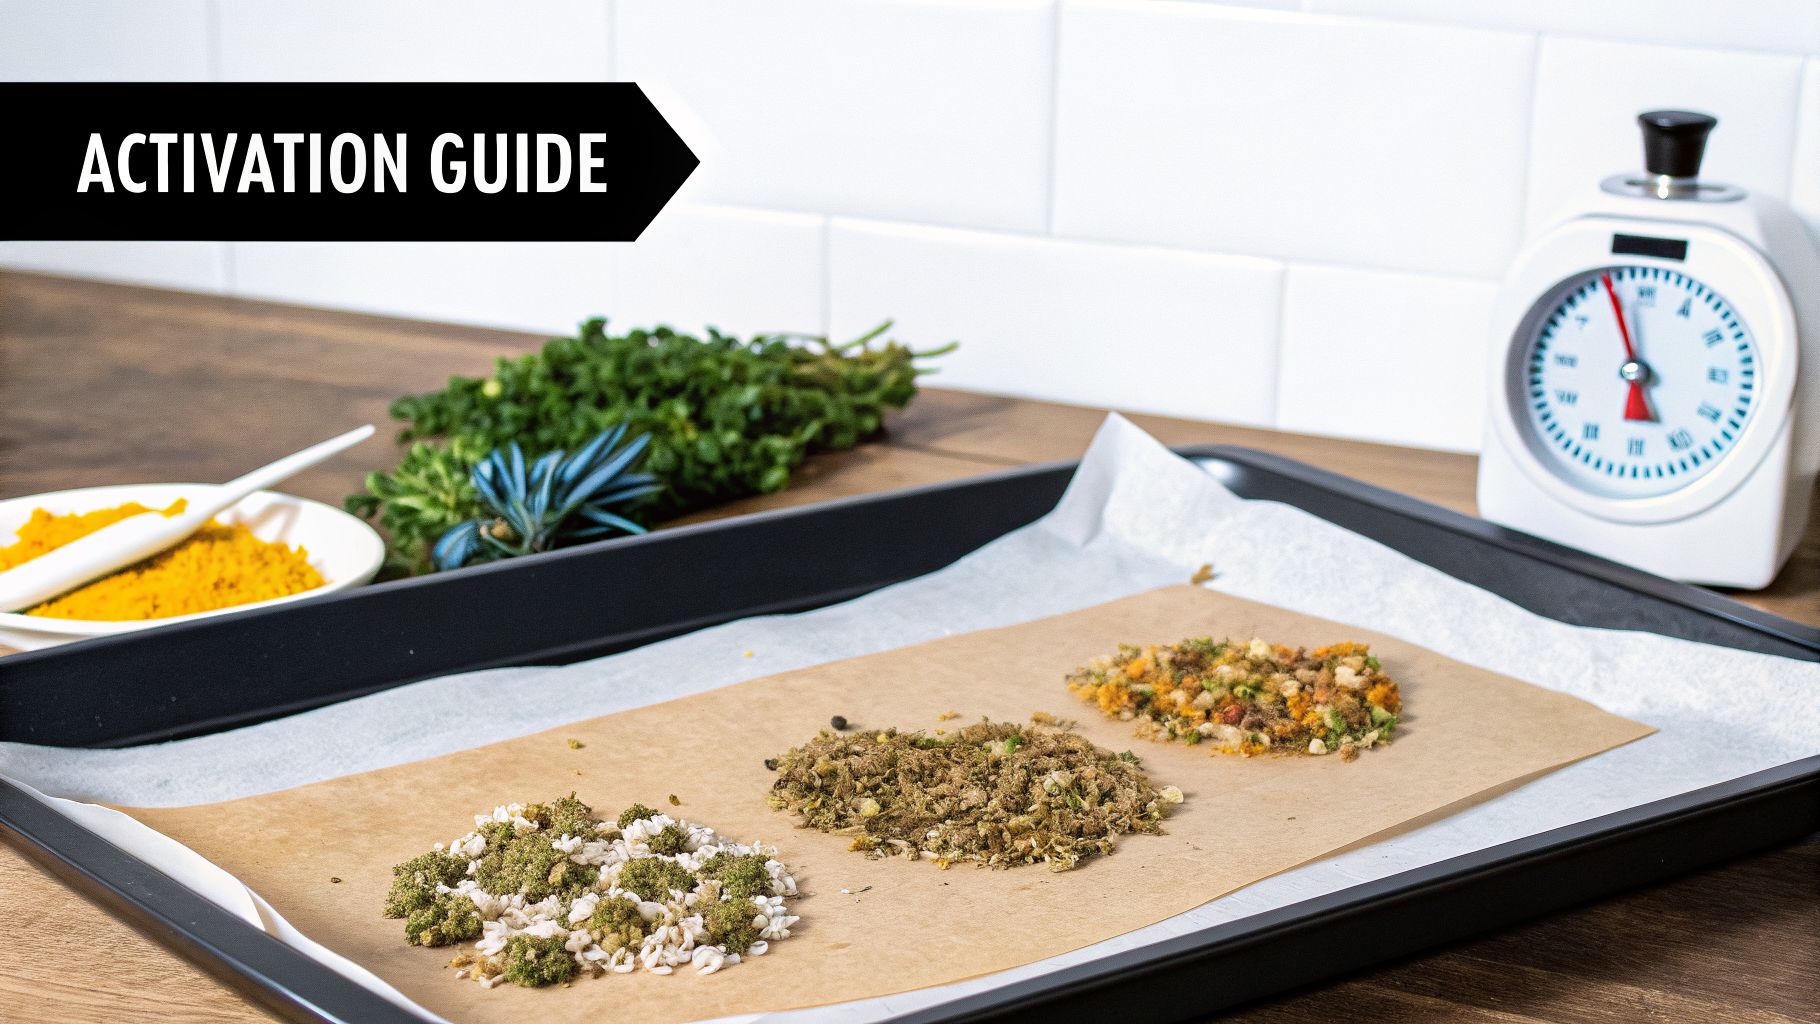
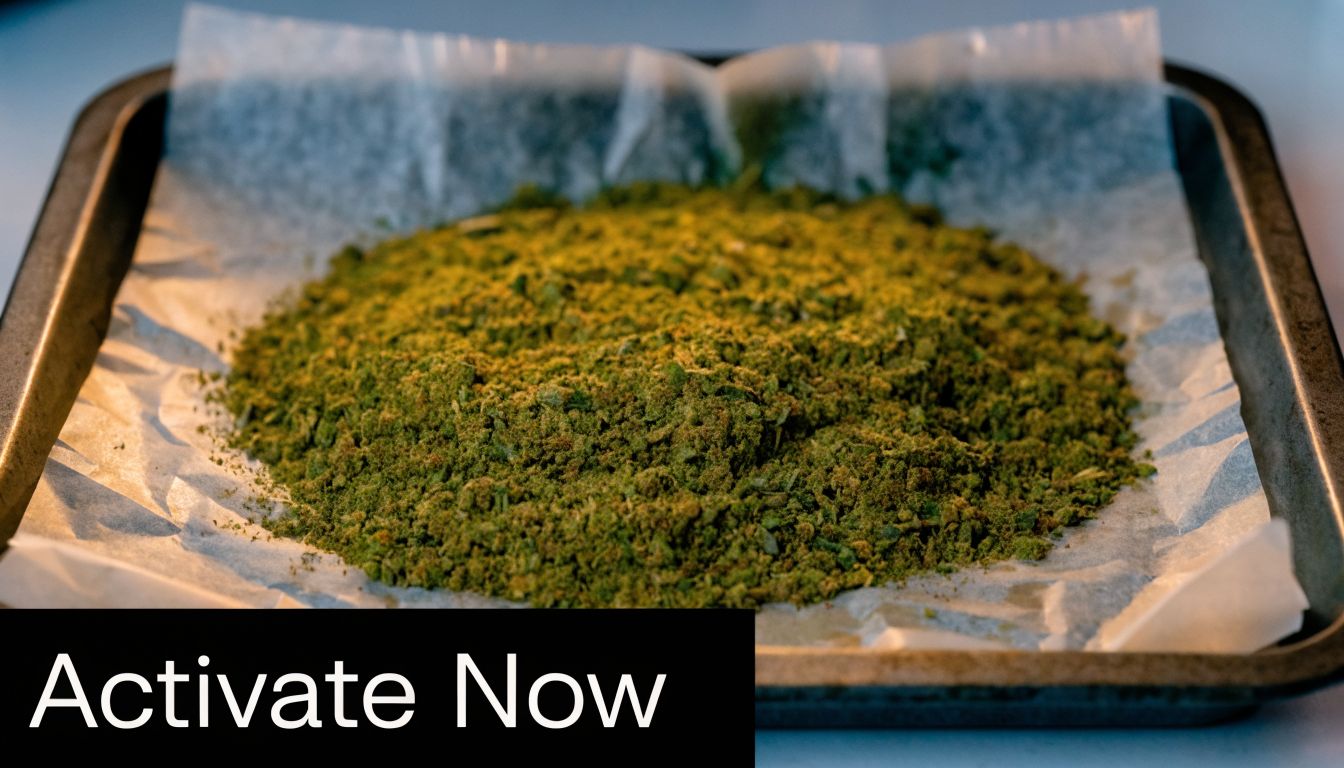
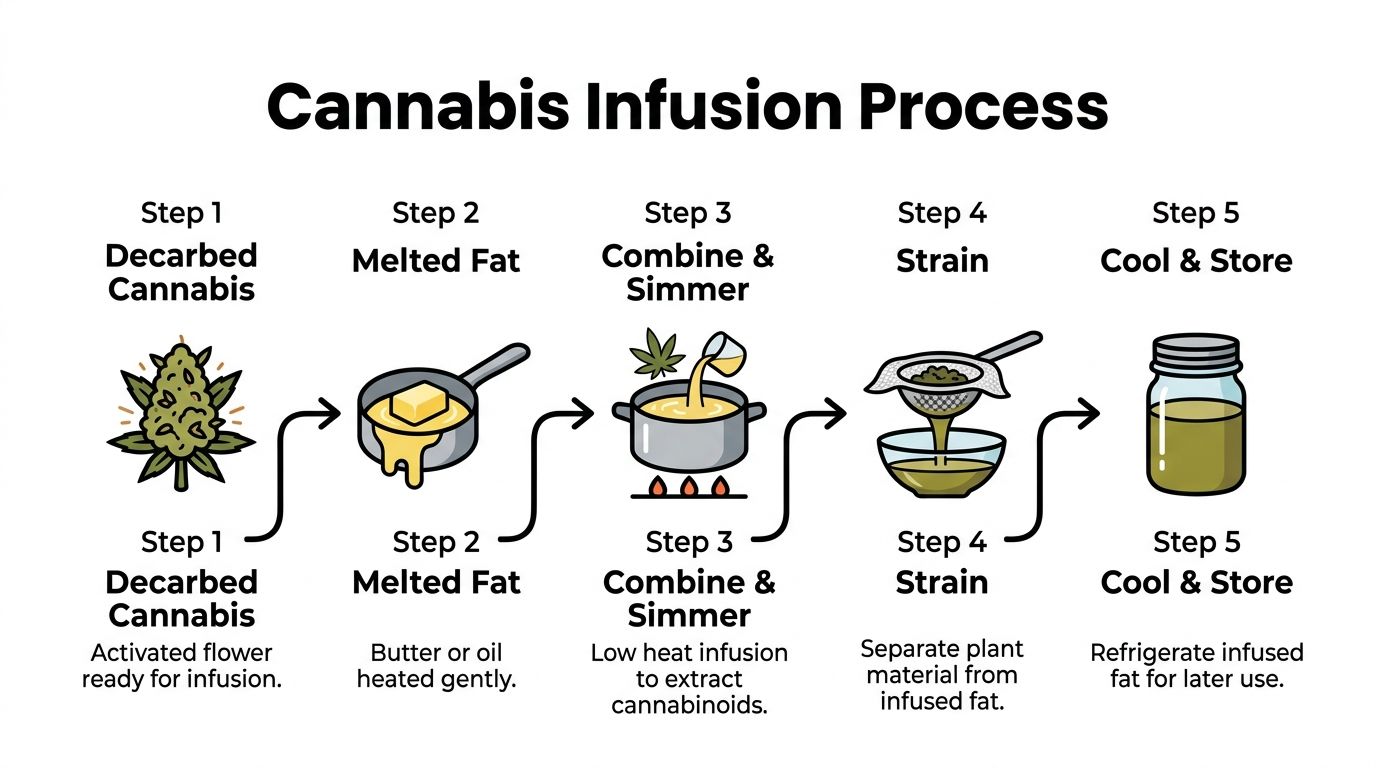
The Critical First Step Activating Your Cannabis

Raw flower won't do much in a brownie batter. The cannabis has to be decarboxylated, which means applying controlled heat so THCA converts into THC. If you skip that step, you can make a tray of beautiful brownies that barely land.

That's the part new cooks underestimate. They think infusion creates potency. It doesn't. Activation comes first.

A pile of ground cannabis plant material spread evenly on parchment paper inside a baking tray.

The decarb method that works

The most reliable home method is straightforward. According to this guide on making medical marijuana infused treats, proper decarboxylation at 240°F (115°C) for 30 to 40 minutes can achieve 90% to 95% cannabinoid activation. The same source notes that overheating above 250°F can degrade THC, while skipping decarb leaves most THCA inactive.

Use this sequence:

  1. Preheat the oven to 240°F
  2. Check the actual temperature with an oven thermometer
  3. Break up the flower coarsely
  4. Spread it evenly on parchment paper
  5. Bake for 30 to 40 minutes
  6. Stir every 10 minutes for more even heating
  7. Cool completely before infusing

That's the core process. Nothing fancy. The discipline is what matters.

Why people ruin decarb at home

Most failed decarb jobs happen in one of three ways.

First, people grind too fine. That creates a dusty layer that can toast unevenly and pull too much plant flavor into the infusion.

Second, they rush and crank the heat. More heat doesn't mean better activation. It means more risk of burning off what you want.

Third, they trust the oven display instead of measuring the actual chamber temperature. Home ovens drift. Some swing hot, some cold, and some cycle hard enough to make a “set it and forget it” approach a bad idea.

If your oven runs hotter than you think, the batch can smell ready before it's actually usable.

What properly decarbed flower looks like

You're not looking for ash, and you're not looking for green raw flower either. Properly decarbed flower usually looks drier, slightly darker, and lightly toasted. The smell gets stronger and more roasted.

Don't chase a dramatic visual transformation. This isn't coffee roasting. You want controlled activation, not visible browning for its own sake.

A practical checklist before the tray goes in

Use this quick check:

  • Texture: Coarse pieces, not powder
  • Pan setup: Single even layer on parchment
  • Temperature check: Oven verified, not guessed
  • Timing: Full window available so you don't rush
  • Ventilation: Decarbing smells strong, so plan for that

A simple way to think about the science

THCA is the locked version. Decarb is the key. If you put raw flower straight into butter, you're infusing a lot of material that hasn't been fully activated. The fat can hold cannabinoids, but it can't replace the heat step.

That's why decarb deserves your full attention. If you're serious about what do you need to make edibles, this is near the top of the list. You need cannabis that's been activated correctly. Everything after that depends on it.

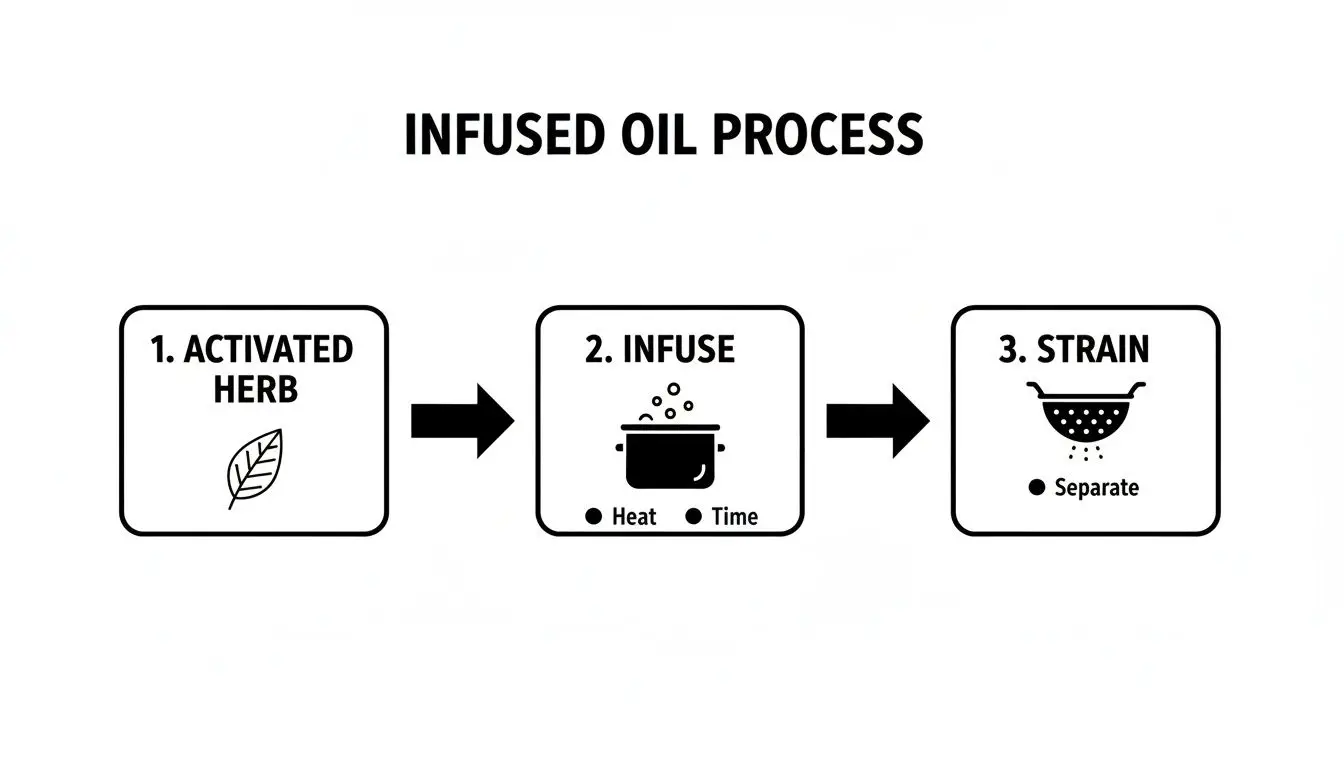
Infusing Fats with Cannabis for Potency

After decarb, the next job is moving those activated cannabinoids into a fat your recipe can use. Butter works. Coconut oil works. Other cooking oils can work too. The key is choosing a fat that suits your recipe and then keeping the infusion gentle.

Many home cooks get impatient and scorch the batch.

An infographic illustrating the five-step process for infusing fats with decarbed cannabis for cooking edibles.

Pick the right fat for the recipe

Butter is great for baked goods. It gives brownies and cookies a classic texture and flavor. Coconut oil is especially useful for gummies, chocolates, and recipes where you want a stable, versatile fat.

If you ask experienced home edible makers what works best overall, many lean toward coconut oil because it stores well and plays nicely in both sweet and savory recipes. Butter still wins when you want familiar baking performance.

The temperature range you want

According to Verilife's edible gummy guide, successful infusion relies on maintaining a low simmer of 160°F to 180°F for 2 to 6 hours, which can achieve 80% to 90% THC extraction efficiency. The same source warns that boiling can destroy 30% to 50% of potency.

That's the main rule. Keep it low. Don't boil.

Two home methods that are reliable

Slow cooker method

This is the easiest for beginners because it reduces the chance of hot spots.

  • Add your fat to the cooker
  • Add the decarbed cannabis
  • Keep the heat low
  • Stir occasionally
  • Let it infuse slowly
  • Strain when finished

A slow cooker is forgiving. It gives you a longer runway and less direct heat aggression.

Double boiler method

This works well if you want more hands-on control.

  • Fill the lower pot with water
  • Put butter or oil and decarbed cannabis in the top vessel
  • Hold the infusion in the target heat range
  • Stir now and then
  • Watch the water level

A double boiler is great if you already cook carefully and don't mind staying near the stove.

Kitchen habit that helps: If the mixture looks like it's trying to boil, back off immediately. Gentle movement is enough.

Straining without ruining flavor

Bad straining leaves behind grit and a strong green taste. Good straining gives you a smoother final product.

Use double-layer cheesecloth or a fine mesh strainer. Let gravity do most of the work first, then press lightly if needed. If you squeeze too hard, you can force more bitter plant material through. Some people want every drop. I'd rather lose a little volume than push harsh flavor into the jar.

Butter versus oil in real recipes

Fat Best use Flavor impact Practical note
Butter Brownies, cookies, blondies Rich and familiar Refrigerate after infusion
Coconut oil Gummies, chocolates, versatile baking Neutral to lightly coconut Easy to portion and store

A few mistakes worth avoiding

  • High heat: This is the fastest way to flatten potency
  • Rushing the timer: Shortcuts usually mean weaker extraction
  • Poor straining: Your texture suffers and the taste gets rough
  • Using the wrong fat: Some recipes just work better with one base than another

Infusion is where your decarbed cannabis becomes something useful in the kitchen. Done well, it gives you a stable ingredient you can use in small, controlled amounts. Done poorly, it gives you an oily, bitter, unpredictable mess.

Calculating Potency and Dosing Your Edibles Safely

Home cooks either become careful or become cocky at this stage. Homemade edibles don't come with a printed label, so the person making them has to do the quality control.

The first thing to remember is that edible effects are delayed. Clinical research noted earlier found onset effects averaging about 3 hours post-ingestion in some studies, which is why waiting matters so much. If you've ever watched someone say “these aren't working” and then regret the second serving later, that's the mechanism in action. If you want a deeper read on timing, this explainer on how long edibles take is useful for setting expectations.

The easy math for estimating potency

Use a simple estimate:

  1. Find the THC percentage of your flower
  2. Convert grams of flower into milligrams
  3. Apply the THC percentage
  4. Adjust for losses during decarb and infusion
  5. Divide by the number of servings

Example formula:

grams of flower × 1,000 = total milligrams of flower material
total milligrams × THC percentage = approximate THC before process losses

Then divide that final estimate by the amount of infused butter or oil you used in the recipe, and then again by the number of pieces you cut.

Because home processes vary, treat your result as an estimate, not a promise.

Reference table for a 1 cup batch of infused fat

The table below gives rough estimates for a batch made from 1 cup of infused oil or butter, then divided across about 48 teaspoons. These are planning numbers, not lab results.

Starting Flower THC % Approx. Total THC in Batch (mg) Approx. THC per Teaspoon (mg)
10% Qualitatively lower potency batch Qualitatively lower per teaspoon
15% Qualitatively moderate potency batch Qualitatively moderate per teaspoon
20% Qualitatively stronger potency batch Qualitatively stronger per teaspoon
25% Qualitatively very strong batch Qualitatively very strong per teaspoon

I'm keeping that table qualitative because exact potency depends on your tested input, your infusion efficiency, and how much fat you recover after straining. Without those exact facts, pretending the final number is precise would be bad advice.

The serving rule that keeps people out of trouble

For homemade edibles, smaller pieces are smarter. Cut brownies into more pieces than you think you need. Stir batter thoroughly. Don't pour all the infused oil into one corner and assume baking will fix it.

Start with a small portion and wait the full window before taking more. Homemade edibles punish impatience.

If you're cooking for friends, tell them what's in the food and how strong you think it is. Label the container. Don't put infused brownies next to regular brownies and expect everyone to keep track.

Good edible making isn't just about potency. It's about restraint.

Beginner Recipes and Proper Storage Solutions

The best first edible recipes are the ones with enough fat to carry cannabinoids well and enough structure that you can portion them evenly. Brownies are a classic because they're forgiving. Gummies can work too, especially if you're using infused oil carefully and mixing thoroughly.

A square chocolate brownie with chocolate chips sitting on a white plate next to gummy candies.

Beginner recipe one brownies

Use your favorite boxed brownie mix or a simple scratch recipe. Replace part or all of the regular fat with your infused butter or oil. If you're new to this, replacing only part of the fat makes it easier to keep the dose manageable and the flavor balanced.

A practical approach:

  • Mix thoroughly so the infused fat is evenly distributed
  • Use a pan size you know so the bake time stays predictable
  • Cut equal pieces after cooling
  • Label immediately once portioned

Brownies are good for beginners because the chocolate helps cover some cannabis flavor. They're also easy to divide into small squares.

Beginner recipe two simple gummies

Gummies are a little more technical because even distribution matters a lot. If you're using infused oil, whisking and emulsifying matter more than they do in brownies. Don't just drizzle oil into a gummy base and hope for the best. You want a uniform mixture before it goes into molds.

If you like the rice crispy style of edible more than baked goods, these cannabis rice crispy treats are a good example of a simpler edible format that doesn't ask much from the cook.

A few recipe habits that improve consistency

  • Warm the infused fat first so it blends more evenly
  • Scrape the bowl fully because potency can cling to the sides
  • Portion with intention using a knife, scoop, or mold
  • Keep a batch note with the date, recipe, and estimated strength

That last one sounds nerdy, but it helps. If a batch turns out stronger than expected, you'll want to remember exactly what you did.

A visual walkthrough can help if you're more of a cook-by-watching person.

Storage matters more than most people think

Storage isn't just about freshness. In DC, it's also part of being responsible with cannabis at home. According to this guide on making edibles with weed, refrigerating cannabutter at 35°F to 40°F extends shelf-life to 2 to 3 months, and it should be kept in airtight glass containers to reduce terpene loss.

That applies to finished edibles too. Keep them sealed, labeled, and out of casual reach.

How to store homemade edibles safely

Use a system like this:

Item Best storage Key note
Cannabutter Airtight glass in the refrigerator Label with date and potency estimate
Infused oil Airtight sealed container Protect from heat and light
Brownies Sealed container in fridge or freezer Separate from non-infused food
Gummies Cool sealed container Watch for sticking and melting

Don't store infused treats in packaging that makes them look like regular snacks. That's how accidental eating happens.

The local responsibility piece

In DC, adults can make edibles for personal use within applicable rules, but that doesn't mean casual handling is fine. Don't give them away carelessly. Don't leave them where children, pets, roommates, or visitors can grab them. And don't forget that “homemade” doesn't excuse bad labeling.

A piece of tape and a marker solve a lot of problems. Write THC-infused, the date, and your best potency estimate. That small habit makes your kitchen safer.

Frequently Asked Questions About Homemade Edibles

Why didn't my edibles work

Usually it's one of three issues. The cannabis wasn't decarbed properly, the infusion ran too hot or too short, or the potency estimate was wrong from the beginning.

Sometimes people also underdose the final recipe without realizing it. They make a full tray of brownies with a mild infusion, then cut it into many servings and assume each square will feel strong. That's not always how the math works out.

Why did my edibles hit way harder than expected

Most often, the person eating them got impatient and took more before the first dose had fully landed. Homemade edibles can also hit unevenly if the batter or gummy mixture wasn't mixed thoroughly.

Another common issue is cutting inconsistent portions. One brownie corner can end up much stronger than another if the pan wasn't mixed or spread well.

Is flower or distillate better for homemade edibles

It depends on the recipe and your tolerance for prep work.

Flower is great if you want full control and don't mind decarbing and infusing. Distillate is useful if you want a cleaner taste and a shorter path into chocolates, gummies, or no-bake recipes. For a first batch, flower teaches the fundamentals better. For convenience, many experienced cooks appreciate the simplicity of a refined concentrate.

How do I make edibles taste less weedy

A few practical fixes help:

  • Choose chocolate, peanut butter, or bold fruit flavors that can stand up to the infusion
  • Strain carefully so less plant material gets into the final fat
  • Don't overcook the infusion
  • Use cleaner starting material

The flavor issue usually starts in the infusion stage, not the recipe stage.

How long should I wait before taking more

Wait for the full effect window. Don't stack doses because you're bored. Edibles are slower than inhaled cannabis, and that delay is exactly what causes trouble.

If you're unsure, treat every homemade edible as stronger than it looks.

Can I use my infused butter in any recipe

Almost any recipe that uses butter or oil can be adapted, but not every recipe is a smart first choice. Start with foods that are easy to portion and mix evenly. Brownies, cookies, rice crispy treats, and simple chocolates are much easier than trying to make something delicate or highly technical.

What should I label on homemade edibles

At minimum:

  • THC-infused
  • Date made
  • Best estimate of strength
  • A warning to keep away from kids and pets

That label is part safety tool, part courtesy to everyone else in the home.

Is it legal to sell homemade edibles in DC

No. Personal use and making your own edibles are not the same thing as selling infused products. Keep homemade edibles in the personal-use lane and stay current on local rules if you live in DC or move between DC, Maryland, and Virginia.

If your real goal is less kitchen guesswork and more dependable products or premium flower for cooking, Green Express DC is a practical option for adults 21+ in Washington, DC who want lab-tested, organic cannabis delivered discreetly. It's a straightforward way to start with better ingredients, whether you're making your own edibles or skipping the cooking and ordering ready-to-enjoy products instead.

Posted on Leave a comment

How to Make Edibles A DC Guide to Homemade Cannabis Treats

At its core, making your own edibles is a pretty straightforward process. You’re simply activating the cannabis, infusing it into a fat like butter or oil, and then using that infusion to cook whatever you want.

When you master these fundamentals, you gain total control over your experience—from potency and flavor to the quality of every single ingredient.

Your Guide to Homemade Cannabis Edibles in the DMV

More and more people I talk to in the DC, Maryland, and Virginia area are getting into making their own edibles, and for good reason. It’s not just about saving a little money; it's about knowing exactly what you’re consuming, especially when you can get quality ingredients from a trusted DC weed delivery service.

This isn't just another recipe dump. I’m going to walk you through the entire process, sharing the same techniques I use in my own kitchen. We'll cover the science, the steps, and the little tips that make all the difference between a great batch and a dud.

A black spiral notebook titled 'Homemade Infusions' on a kitchen counter with jars, spoons, and herbs.

Why Make Your Own Edibles

The single biggest advantage of DIY edibles is complete control. You're the chef, and you call all the shots. For anyone in the DMV who's serious about quality and consistency, learning this skill is a game-changer.

Here's what that control really gets you:

  • Potency Control: You decide how strong your edibles are. Want a barely-there microdose for focus or a heavy-hitter for a weekend movie marathon? You can dial it in perfectly.
  • Ingredient Quality: No more mystery ingredients, artificial flavors, or preservatives. You get to choose the exact butter, oil, and flour that fit your dietary needs and tastes.
  • Cost Savings: Making edibles in batches is significantly more affordable than buying them one by one. I often use high-quality shake from a DC weed delivery service to make my infusions, which keeps costs way down.
  • Strain Selection: This is a big one. You can infuse your favorite indica for relaxation or a creative sativa for a boost of energy, tailoring the final effect to exactly what you’re looking for.

One thing I can't stress enough is the importance of starting with accurately labeled flower. Using a lab-tested product from a trusted DC, Virginia, or Maryland weed delivery service like Green Express DC gives you a known THC percentage. This is absolutely essential for calculating your dosage and avoiding any unwelcome surprises.

Think of this guide as your kitchen companion for making safe, predictable, and delicious edibles. We’ll start with the most critical part of the whole process: activating your cannabis through decarboxylation. It’s the one step you absolutely can't skip if you want your edibles to have any effect at all.

The First, Most Crucial Step: Activating Your Cannabis (Decarboxylation)

Ground plant materials on baking paper for activation, with a timer and herbs in a kitchen setting.

So you're ready to make your own edibles. Before you grab the butter and mixing bowl, there's one step you absolutely cannot skip if you want them to have any effect at all. It's called decarboxylation—or "decarbing" for short—and it's the secret to unlocking your cannabis's potential.

Think of it this way: the raw cannabis flower you get from a DC, Maryland, or Virginia weed delivery service is full of a compound called THCA. In this form, it's not psychoactive. To get the classic effects people seek, you need to gently heat it, which chemically converts that sleepy THCA into the active THC we all know.

When you smoke or vape, this happens instantly. In the kitchen, however, you have to make that magic happen yourself. If you skip this, you’ll end up with a batch of snacks that taste very, very earthy but won't deliver any of the desired effects. It’s a common rookie mistake.

The Foolproof Oven Method

The most straightforward way to decarb is using the oven you already have. It's a reliable method that just requires a baking sheet and some parchment paper. The whole game is about low and slow heat to activate the good stuff without burning it away.

Start by preheating your oven to 240°F (115°C). As it heats up, gently break your flower apart into small, popcorn-sized nugs. Resist the urge to grind it into a fine powder—this makes it much easier to burn and a pain to strain out later.

Spread your cannabis evenly in a single layer on a baking sheet lined with parchment paper. Pop it on the middle rack for about 30 to 40 minutes. You'll know it's ready when the vibrant green has turned into a light, toasty brown and your kitchen smells nutty and, well, like roasted cannabis.

Pro Tip: Oven thermostats are notoriously fickle. I always use a cheap, separate oven thermometer to know the real temperature. Being just a few degrees too hot can scorch your cannabinoids, effectively ruining the flower you paid for from your DC weed delivery.

Decarboxylation Temperature and Time Guide

Achieving the right balance of temperature and time is key. Too hot or too long, and you risk degrading THC into other cannabinoids like CBN, which is known for its sedative effects. Too low or too short, and you won't get a full conversion.

Here’s a quick reference guide I've honed over years of kitchen experiments.

Temperature Time Outcome & Notes
220°F (104°C) 45-60 min A lower, slower method that is excellent for preserving terpenes (aroma/flavor compounds). Great if you're not in a hurry and want a more flavorful oil.
240°F (115°C) 30-40 min The go-to standard for most home cooks. It's the sweet spot for efficient THC activation without significant terpene loss. My personal recommendation.
250°F (121°C) 20-25 min A bit faster, but you need to watch it closely. Best for those who know their oven runs true and want to speed things up slightly.

Remember, these are guidelines. Your specific oven, the freshness of your flower, and its moisture content can all influence the perfect time.

The rise of homemade edibles is no surprise when you see the numbers. The cannabis edibles market is projected to hit an incredible USD 60.2 billion by 2035, and edibles already make up 27% of total cannabis sales. It's clear that consumers in DC, Virginia, and Maryland are embracing potent, smoke-free options, often sourced from convenient weed delivery services. If you're interested in the data, you can read the full research about these market trends to see just how big this movement has become.

Managing the Aroma and Exploring Alternatives

Let’s be real: decarbing cannabis is not a low-odor activity. If you're in an apartment or have neighbors close by in the DMV, you might want to contain the tell-tale smell. The easiest trick is to create a tightly sealed pouch with aluminum foil on your baking sheet before it goes in the oven.

If you’re looking for even more discretion or precision, a couple of other methods work beautifully:

  • Sous Vide: This is for the true cannabis connoisseur. You vacuum-seal the flower and place it in a precisely heated water bath. It gives you perfect temperature control and traps virtually all the smell.
  • Mason Jar: A great low-tech solution. Just put your broken-up cannabis in a canning jar, seal it, and lay it on its side in the oven. This does a fantastic job of containing the aroma, but make sure you’re using a quality, heat-safe glass jar to avoid any kitchen disasters.

Whichever path you take, getting decarboxylation right is the foundation of a great edible. It ensures every last bit of potential is unlocked from your flower, setting you up for a consistent, potent, and enjoyable final product.

Making Your Infusion: Cannabutter and Canna-Oil

Now that your cannabis is decarbed and activated, you're ready for the really fun part. This is where we infuse that goodness into a fatty base, creating the magic ingredient for all your homemade edibles.

The science here is simple. Cannabinoids like THC are lipophilic, which is a fancy way of saying they bond with fat, not water. This is why we don't just boil cannabis in water. By infusing it into butter or oil, we give the THC a vehicle to travel in, making it available for your body to absorb.

Picking the Right Fat for the Job

So, what should you use? Butter or oil? The answer really just depends on what you plan on cooking. There’s no single best option, so think about your end goal. For most of us in the DC, Virginia, and Maryland area, starting with butter or coconut oil is the way to go, especially when you can easily get your main ingredient from a local weed delivery service.

  • Unsalted Butter (Cannabutter): The OG choice. It’s the go-to for classic baked goods like cookies, brownies, and cakes. As a bonus, the milk solids in butter often brown a little during the infusion, adding a rich, nutty flavor that I personally love in my recipes.

  • Coconut Oil (Canna-Oil): This one is a close second in popularity and incredibly versatile. Coconut oil is packed with saturated fat, which is fantastic for cannabinoid absorption. It’s perfect for vegan recipes, savory cooking, or even just filling capsules for easy dosing.

  • Other Oils: Don't feel limited to just those two. I’ve had great results with olive oil for savory dishes like infused pasta sauces and salad dressings. Just be mindful that it has a lower smoke point, so you have to be extra gentle with the heat. MCT oil is another excellent, flavorless choice for tinctures.

As a starting point, I always recommend a 1:1 ratio: one cup of fat (like butter or oil) for every one cup of ground, decarbed flower. A more precise measurement is about 7-10 grams of flower per cup of fat. This is a solid baseline to start from.

Infusion Method 1: The Classic Stovetop

This is the old-school, hands-on method. It's the quickest way to get an infusion done and doesn't require any fancy gadgets—just a saucepan, a spoon, and your full attention.

You can set up a simple double boiler by placing a heatproof bowl over a pot of simmering water. Or, if you’re confident in your stove's low settings, you can just use the saucepan directly. First, melt your butter or oil completely.

Once it's liquid, stir in your decarbed cannabis. Your main job now is to maintain a very low, gentle heat. You want a light simmer, somewhere between 160°F and 200°F. Never let it boil, or you'll scorch the cannabinoids and ruin the flavor. Let it infuse for 2 to 3 hours, stirring every 20-30 minutes to make sure nothing sticks or burns on the bottom.

Infusion Method 2: The Slow Cooker (My Favorite)

Honestly, this is my preferred technique. It's the definition of "set it and forget it" and delivers a beautifully consistent infusion every time. The slow cooker’s gentle, steady heat is practically foolproof.

Just add your oil or butter and the activated cannabis to your slow cooker. Turn it on the "low" or "warm" setting, pop the lid on, and let it do its thing for 4 to 6 hours. I like to give it a quick stir every hour or so, but it’s very forgiving. This longer, slower extraction is excellent for pulling out a full spectrum of cannabinoids.

Straining Your Infusion

Alright, your kitchen smells amazing and the infusion is done. The next part is crucial for getting a clean, good-tasting final product: separating the plant material from the fat.

Grab a clean bowl or jar. Stretch a few layers of cheesecloth over the top, or use a fine-mesh strainer. Carefully and slowly pour the hot, infused mixture through the cheesecloth.

Let gravity do the work for you. Whatever you do, resist the urge to squeeze the cheesecloth! I know it’s tempting to get every last drop, but squeezing forces out bitter chlorophyll and other plant compounds. This will make your edibles taste harsh and grassy.

If you’re looking to make bigger batches without breaking the bank, using high-quality shake is a smart move. Many DC weed delivery services offer great deals that are perfect for infusions, like this 3 oz exotic shake bundle from Green Express DC. It’s a cost-effective way to get a lot of material to work with.

Once strained, you’ll be left with a beautiful, green-hued cannabutter or canna-oil. Let it cool, then transfer it to an airtight container. It'll keep in the fridge for a few weeks or in the freezer for months, ready for your next culinary adventure.

Figuring Out Edible Potency: Your Guide to Safe and Predictable Dosing

Alright, you’ve successfully decarbed your flower and infused your first batch of butter or oil. The hard part is over, right? Almost. Now comes the single most important step for having a good time with your homemade edibles: calculating how strong they are.

Getting the dose right is everything. It’s the difference between a fantastic, enjoyable experience and an overwhelming, uncomfortable one. Trust me, you don't want to play guessing games here. A weak edible is a letdown, but one that's too strong can ruin your whole day. The good news is that a little simple math is all you need to get a solid estimate of the THC in every single bite.

It All Starts with Your Flower

Your entire calculation hinges on one number: the THC percentage of the cannabis you started with. This is the foundation. Without it, you're flying blind.

This is exactly why you should always source your flower from a reputable DC, Maryland, or Virginia weed delivery service that provides lab-tested products. When a trusted source like Green Express DC says a strain has 20% THC, you have a reliable number to work with. It takes all the guesswork out of the equation and gives you the confidence to dose properly.

The physical part of the process—turning your activated herb into a clean, strained infusion—is just half the battle.

A three-step diagram illustrating the infused oil process, from activated herb to infusion and straining.

Now, let's pair that process with the math to make sure your final product is dosed just right.

Let's Do the Math (It's Easier Than You Think)

The formula can look a bit intimidating at first glance, but I promise it's pretty simple once you break it down.

First, we need to find the total amount of THC available in the flower you used.

  • Convert your flower's weight from grams to milligrams. Just multiply the grams by 1,000.
  • Multiply that number by the THC percentage. Remember to convert the percentage to a decimal (e.g., 20% becomes 0.20).

Here’s a real-world example: Let's say you're using 3.5 grams of flower from a DC weed delivery service that's been tested at 20% THC.

3.5g x 1,000 = 3,500mg of flower

3,500mg x 0.20 = 700mg of total THC

This 700mg figure represents the maximum potential THC in your batch. Keep in mind that a home infusion process isn't perfectly efficient—you might lose a little along the way—but this gives you a fantastic and reliable starting point.

Calculating Your Per-Serving Dose

Once you know the total THC in your infused butter or oil, figuring out the dose per edible is the easy part. You just have to divide.

Simply take that total THC amount and divide it by the number of servings your recipe makes.

Continuing our example: You use that butter infused with 700mg of THC to bake a batch of 24 cookies.

700mg / 24 cookies = approximately 29mg of THC per cookie.

Now you have crucial information. Knowing each cookie packs around 29mg lets you make an informed choice. If you're new to edibles, you might start with just a quarter or half of a cookie and see how you feel.

This demand for precise dosing is a huge driver of the modern cannabis market. The global edibles market, valued at USD 14.47 billion in 2025, is expected to skyrocket to USD 55.82 billion by 2034. This trend isn't surprising, especially when you see that in North America, over 40% of non-medical users prefer edibles for their consistency and control. If you're interested in the market dynamics, you can discover more insights about the cannabis edibles market and its incredible growth.

The Golden Rule: Start Low and Go Slow

If you remember nothing else from this guide, remember this: start low and go slow. It's the cardinal rule of edibles. You can always eat more, but you can never, ever eat less.

  • For Beginners: A dose of 2.5mg to 5mg is a great starting point.
  • Be Patient: After you take your first dose, wait at least two full hours before even considering taking more. Edibles have a notoriously slow onset, and impatience is your enemy.

By taking a few minutes to do the math, you elevate your edible-making from a game of chance to a true craft. It’s the most responsible way to enjoy your creations and ensure every experience is a positive one.

Simple and Delicious Edible Recipes to Start With

A stack of chocolate chip cookies on a wooden board next to a jar of infused butter and an 'Easy Recipes' sign.

You've done the hard part—your cannabutter or canna-oil is made and ready to go. Now, the real culinary adventure begins. This is where you get to turn that potent, carefully crafted infusion into treats that are genuinely delicious.

When you're just starting out, the best approach is to stick with reliable, straightforward recipes. Forget the idea that edibles have to be brownies. While the classics are great for a reason, your infusion is an incredibly versatile ingredient that can work wonders in both sweet and savory dishes.

We'll start with two beginner-friendly recipes I've had great success with. They're easy to follow and even easier to enjoy.

Chewy Chocolate Chip Canna-Cookies

There's something universally comforting about a warm, chewy chocolate chip cookie. This recipe is a tried-and-true classic, and it provides the perfect canvas for your infused cannabutter. The only change you need to make is swapping regular butter for your homemade creation.

What You'll Need:

  • 1 cup (2 sticks) of your homemade cannabutter, softened
  • ¾ cup granulated sugar
  • ¾ cup packed brown sugar
  • 2 large eggs
  • 1 teaspoon vanilla extract
  • 2 ¼ cups all-purpose flour
  • 1 teaspoon baking soda
  • ½ teaspoon salt
  • 1 cup semi-sweet chocolate chips

Putting It All Together:

First, get your oven preheating to 375°F (190°C). While it heats up, grab a large bowl and cream your softened cannabutter with both the granulated and brown sugars. You're looking for a light, fluffy texture—don't rush this part, as it's key to a great cookie.

Next, beat in the eggs one at a time, then add the vanilla. In a separate, smaller bowl, just give the flour, baking soda, and salt a quick whisk. Slowly add this dry mix to your wet ingredients, mixing only until everything is just combined. Overmixing will make your cookies tough, so be gentle.

Now for the best part: fold in the chocolate chips. Drop rounded tablespoons of the dough onto an ungreased baking sheet and slide them into the oven. They’ll need 9 to 11 minutes, or until you see the edges turning a lovely golden brown. Let them cool on the sheet for a few minutes before moving them to a wire rack to cool completely.

If you're a chocolate lover, try mixing in different types, like dark or milk chocolate chunks. To see how the pros infuse chocolate into their confections, you can learn more about infused chocolate products available from many DC, Maryland, and Virginia weed delivery services.

Don't forget the dosing math we walked through earlier. If your entire batch of cannabutter had 700mg of THC and this recipe yields 36 cookies, each cookie will pack around 19.4mg of THC. Always, always label your finished treats with the dosage per cookie!

Savory Infused Garlic and Herb Butter

Edibles aren't just for satisfying a sweet tooth. This savory garlic and herb butter is one of my favorite ways to infuse regular meals. It’s absolutely fantastic spread on warm sourdough, tossed with pasta, or melted over a freshly grilled steak or roasted vegetables.

What You'll Need:

  • ½ cup (1 stick) of your homemade cannabutter or canna-oil
  • 2-3 cloves of garlic, minced
  • 1 tablespoon fresh parsley, finely chopped
  • 1 teaspoon fresh rosemary or thyme, finely chopped
  • A pinch of salt and black pepper

Creating Your Savory Spread:

This one couldn't be simpler. In a small bowl, just combine your softened cannabutter with the minced garlic, chopped fresh herbs, salt, and pepper. Mix it all together until everything is evenly distributed.

For the best flavor, I highly recommend chilling it in the fridge for at least an hour. This gives the garlic and herbs time to really meld with the butter. You can roll it into a log with parchment paper to make slicing easy, or just keep it in a small airtight container.

This infused butter is also a perfect vehicle for microdosing. A single teaspoon on your morning toast could contain just 2-4mg of THC, offering a subtle, functional effect without the full-on edible experience. It’s a complete game-changer and shows just how creative you can get once you master the basics.

Keeping Your Creations Fresh and Your Experiences Safe

You’ve put in the time and effort in the kitchen, and now you have a batch of delicious homemade edibles. The last, and arguably most important, part of the process is making sure they’re stored properly and enjoyed responsibly. This isn’t just about freshness—it's about safety.

Think of your edibles just like any other perishable food you’d make. For things like brownies or cookies, an airtight container in the fridge is your best friend. They’ll stay fresh and potent for about a week. If you want to keep them longer, the freezer is the way to go. Just wrap them up individually (parchment paper works great) before freezing, and they’ll be good for several months.

Storing Your Infusions for Later

That leftover cannabutter or canna-oil is liquid gold, so don’t let it go to waste! Pour it into a clearly marked, airtight jar. It’ll last in the fridge for a couple of weeks or in the freezer for up to six months, ready for your next culinary adventure.

Speaking of marking your containers, this is the one step you absolutely cannot skip.

Every single thing you make—from the finished gummies to the jar of infused oil—needs a clear, bold label. Write down what it is, the date you made it, and most critically, the estimated dose per serving. Then, store it all securely, tucked away from kids, pets, and any unsuspecting friends or family.

The Golden Rules of Enjoying Edibles

Making edibles is one skill; knowing how to enjoy them is another entirely. A great experience really comes down to patience and being mindful of how these things work.

  • Trust Your Math: You did the work to estimate the potency. Now, trust that number and respect the dose you’ve calculated.
  • Start Low and Go Slow: Even if you’re a seasoned pro, every new batch can hit a little differently. Start with a small piece, maybe a quarter or half of what you think a full serving is, and just see how you feel.
  • Wait at Least Two Hours: This is the most common mistake people make. Edibles have to travel through your digestive system and liver before they take effect, which takes time. Remember the classic mantra: you can always eat more, but you can never eat less.
  • Set and Setting Matter: Your environment has a huge impact on your experience. Enjoy your edibles in a comfortable, safe place where you can relax. And be very cautious about mixing them with alcohol, as it can make the effects much stronger and far more unpredictable.

This careful, dose-conscious approach is a big reason why edibles are becoming so popular. The market, valued at USD 12,401.25 million in 2024, is expected to skyrocket to USD 38,710.05 million by 2032. In major markets, edibles are already capturing a massive 27% of all sales. For those of us in DC, Virginia, and Maryland, that means we’re seeing an incredible variety of options from local weed delivery services. If you're a data nerd like me, you can read more about the cannabis edibles market trends here.

Of course, if you'd rather skip the kitchen session altogether, you're in luck. For anyone in the DMV, opting for professionally made products from a trusted DC, Virginia, or Maryland weed delivery service gives you guaranteed potency and safety, with no math or cleanup required.

Common Questions About Making Edibles

When you first dive into making your own edibles, a few questions always seem to pop up. It’s a learning process, and we get a lot of the same queries from folks across the DC, Virginia, and Maryland area. Let's clear up some of the most common ones.

Why Didn't My Homemade Edibles Work?

This is the number one question I hear, and the answer is almost always the same: you probably skipped decarboxylation. I've seen it happen a hundred times.

Raw cannabis flower is full of THCA, which won't get you high. You need to apply gentle, consistent heat to convert that THCA into psychoactive THC. If you just throw raw flower from your DC weed delivery into your brownie mix, all you’re getting is a vaguely grassy flavor with none of the effects. You have to activate it first!

Another common misstep is a poor infusion. If your temperature is too low or you don't let it simmer long enough, the THC won't have a chance to properly bind to the fats in your butter or oil.

Can I Use Shake or Trim to Make Edibles?

Absolutely! In fact, it’s one of the smartest ways to make your supply go further. Shake and trim are perfect for infusions because the final appearance of the flower doesn't matter one bit—it all gets strained out in the end anyway.

A quick pro-tip: Shake and trim usually have a lower THC percentage than top-shelf flower. You’ll either need to use more of it to reach your desired potency or just be prepared for a milder batch. It's a fantastic, budget-friendly approach, and many DC, Maryland, and Virginia weed delivery services offer it.

How Long Do Edibles Take to Kick In?

With edibles, patience isn't just a virtue—it's a necessity. The effects can take anywhere from 30 minutes to a full 2 hours to show up. It all depends on your metabolism, what else you've eaten that day, and of course, the strength of the edible itself.

This is critical: Always wait at least two hours before even considering taking more. The classic mistake is thinking it didn't work and doubling the dose, only to have the first one hit you moments later.

Is It Legal to Make Edibles in DC, Maryland, and Virginia?

For your own personal use, yes, but the rules differ. In Washington, DC, adults 21 and over can legally grow, possess, and process their own cannabis. In Maryland and Virginia, adults can also possess and cultivate specific amounts. This includes whipping up a batch of brownies or gummies for yourself. What you can't do anywhere, however, is sell them.

If you're in the DMV and would rather have a guaranteed, compliant, and easy option, ordering from a trusted DC weed delivery service is a great way to go. For more specifics on the local rules, you can find a lot more detail in our frequently asked questions.


Ready to skip the kitchen mess entirely and enjoy premium, lab-tested products? Green Express DC delivers top-tier organic cannabis right to your door anywhere in Washington, DC, and serves the greater Maryland and Virginia areas. Check out our menu and place your order today at https://greenexpressdc.com.